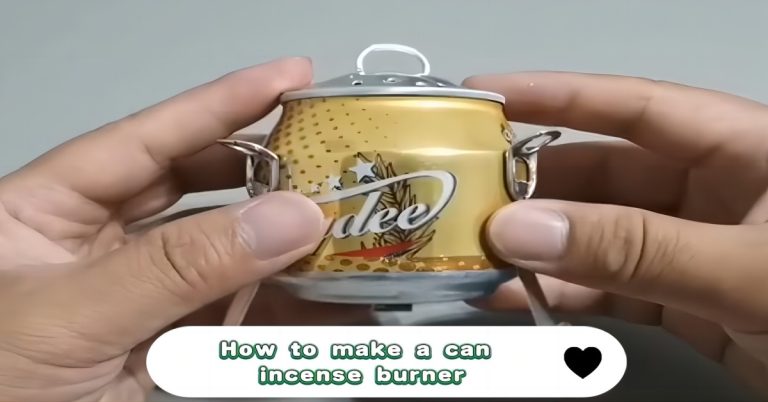
Recycling everyday materials into functional and aesthetically pleasing items is a rewarding and environmentally conscious way to repurpose waste. Today, I will choose an used empty beer to guide you how to create a fantastic backflow incense burner from an empty beer can. This project is not only a great way to reduce environmental impact but also offers a creative outlet for DIY enthusiasts. By transforming a discarded beer can into an elegant incense burner, you can create a unique piece that enhances the ambiance of your home. This project is both accessible and practical, requiring minimal materials and tools while delivering impressive results. As you embark on this journey, you’ll not only learn a new skill but also contribute to a more sustainable lifestyle. In this step-by-step guide, we will explore how to repurpose a beer can into a functional incense burner, combining creativity with environmental responsibility. This process will allow you to create a personalized and eco-friendly item that serves both decorative and practical purposes in your space.
Why I Use Wasted Beer Can to Make This Incense Burner?
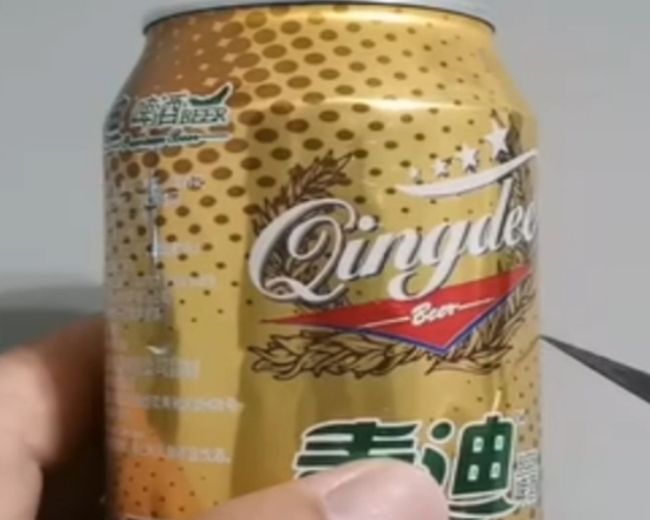
I chose a wasted beer can for this DIY project primarily because it’s an environmentally friendly option, emphasizing the importance of recycling and reusing materials that would otherwise contribute to waste. Beer cans are not only common and easily accessible, but they also offer a perfect example of how everyday items can be repurposed into something functional and decorative. By using a beer can, the project highlights the potential of recycling, showing that with a bit of creativity, discarded items can be transformed into useful objects, reducing our environmental footprint. Furthermore, the versatility of this project allows for the use of other similar materials, such as soda cans or other aluminum containers, demonstrating that the concept can be adapted to whatever materials are available. This flexibility encourages sustainable practices and inspires others to think creatively about how they can repurpose waste in their own lives, turning trash into something valuable and beautiful


Materials and Tools You Need
- An empty soda can
- A pair of scissors or tin snips
- A small drill or a sharp object for making holes
- Pliers (optional)
- Hot glue or strong adhesive (optional)
Time Estimated
About 3-5 Minites
7 Steps to Make A DIY Incense Burner
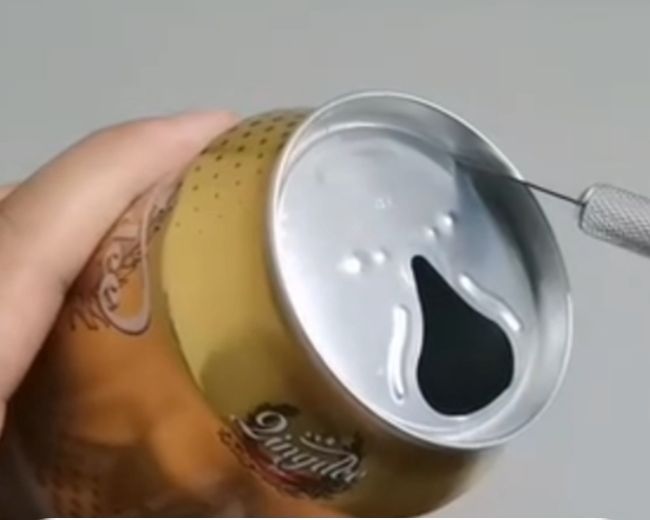
Step 1: Cut Off the Top of the Can
Prepare your workspace with a stable surface and good lighting. Carefully cut off the top portion of the beer can, including the mouth and the area just below the curve. This step is key, as it forms the base of your incense burner. Use tin snips or heavy-duty scissors for a clean cut; regular scissors might cause uneven edges.
Cut slowly and steadily, following the can’s contour. It’s best to cut just below the curved edge, as this thicker area offers stability for the rest of the project. Watch out for sharp edges that can cause injuries—wearing protective gloves is advisable.
After removing the top, smooth any jagged edges with a file or sandpaper. This makes the can safer to handle and gives your incense burner a polished look. Taking care with this step ensures a smoother process for the rest of your DIY project
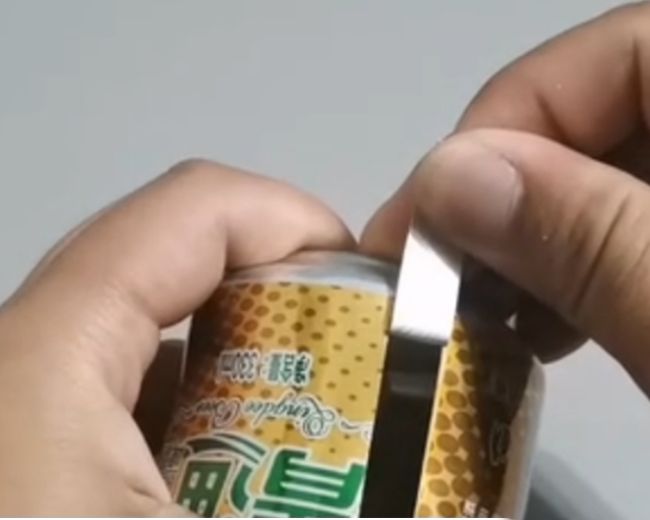
Step 2: Cut the Can in Half
After removing the top of the can, the next step is to cut the can in half horizontally. This creates the two main parts of your incense burner: the base and the lid. Begin by marking a line around the middle of the can to guide your cut. Using tin snips, heavy-duty scissors, or a utility knife, carefully cut along this line, ensuring the cut is as straight and even as possible.
Once cut, you’ll have two halves: the bottom, which will serve as the base of your burner, and the top, which can be used to create the lid. The base is where the incense will sit and the ash will collect. The top half, now open on both ends, will become the lid, which helps control airflow and smoke release.
Before moving on, inspect both halves for sharp edges and use a file or sandpaper to smooth them out. This ensures safety and a better fit when the lid is placed on the base. With your can now divided into two parts, you’re ready for the next step in crafting your incense burner.
Step 3: Make Legs for the Incense Burner
Using the leftover scraps from the can, you’ll now create the legs for your incense burner. Start by cutting out three thin strips of aluminum, each about 1 cm in width and long enough to provide adequate height and stability for the burner. Precision in cutting is important to ensure the legs are of equal size, which will help the burner stand evenly.
Once you have your strips, it’s time to shape them into legs. Begin by gently rolling or folding one end of each strip to create a small loop or curve—this will form the base that supports the burner. The slight curve provides more surface area for the legs to rest on, making the burner stable on flat surfaces. If the aluminum is too stiff to bend by hand, use a pair of pliers to help shape the metal more easily.
After forming the base of the legs, adjust them as needed to ensure they’re uniform in height and angle. This step is crucial for ensuring that your incense burner sits level and doesn’t wobble. Once all three legs are shaped, you’re ready to attach them to the base of your burner in the next step
Step 4: Assemble the Burner
With the legs prepared, it’s time to attach them to the bottom half of the can, which will serve as the base of your incense burner. Begin by positioning the legs evenly around the base, ensuring they are spaced equally to provide stability. This step is important because unevenly spaced legs can cause the burner to wobble or tip over.
There are two methods for attaching the legs: using hot glue or creating small cuts and slots in the base. If you choose to use hot glue, apply a generous amount to the end of each leg and press it firmly onto the can’s base. Hold it in place for a few seconds until the glue sets. For a more secure attachment, you can make small cuts in the base of the can and insert the ends of the legs into these slots. This method may require a bit more precision but will provide a sturdier connection.
After attaching all three legs, check that the burner stands level on a flat surface. Adjust the legs as needed to ensure stability. With the legs securely in place, your incense burner is now taking shape and ready for the final steps of assembly

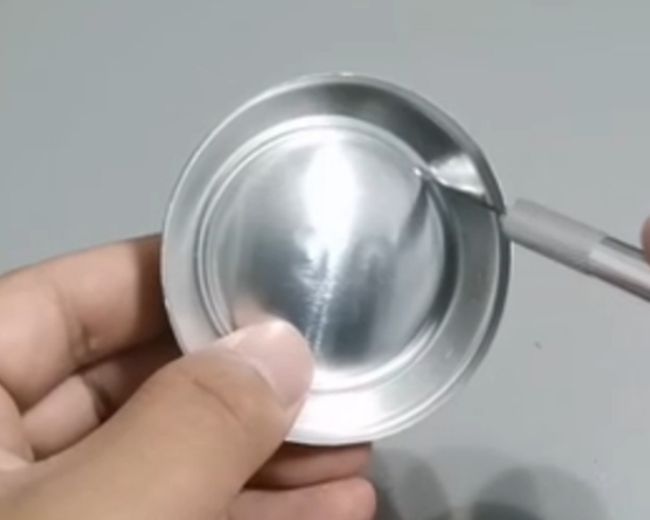
Step 5: Create the Lid
Now it’s time to craft the lid for your incense burner using the top half of the can that you set aside earlier. Start by carefully cutting out the bottom core of this piece, creating an open-ended cylinder. This section will serve as the lid, controlling the flow of air and allowing the incense smoke to escape.
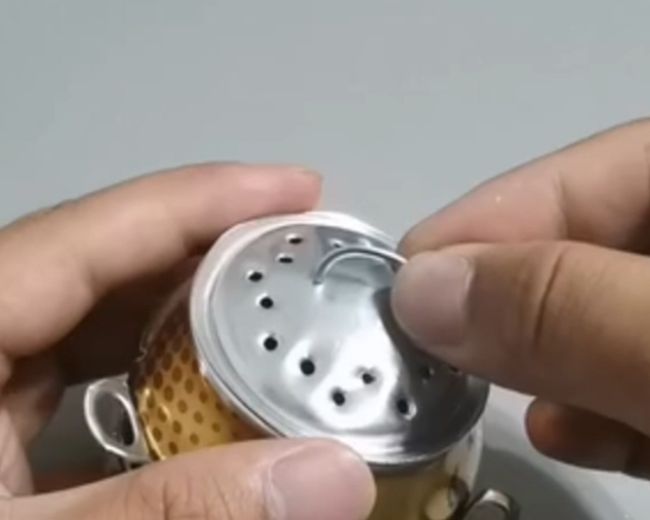
Once the bottom core is removed, it’s time to add ventilation holes. These holes are essential for allowing the smoke to diffuse out of the burner while maintaining the proper airflow for the incense to burn efficiently. Using a small drill, a sharp object, or even a nail, carefully punch small holes into the lid. You can arrange these holes in a simple grid pattern, or get creative and form shapes or designs that add a decorative touch to your burner.
Be mindful not to make the holes too large or too close together, as this could weaken the lid. The goal is to strike a balance between functionality and aesthetics, ensuring that the smoke can escape without compromising the structural integrity of the lid. With the holes in place, your lid is ready to be fitted onto the base, completing the main structure of your incense burne
Step 6: Add the Handle
To make your incense burner easier to handle, you’ll need to add a small handle to the lid. Start by taking the ring pull from the can and cutting it in half. This ring pull will serve as the handle, making it easy to lift and replace the lid when needed.
Once you have the ring pull cut in half, shape it into a small, manageable handle. You can either leave it as a simple loop or bend it slightly to create a more ergonomic grip. After shaping, you’ll need to attach this handle to the lid. There are two ways to do this: using glue or creating small tabs.
If you choose to glue the handle, apply a strong adhesive to the base of the ring pull and press it firmly onto the lid. Hold it in place for a few seconds to ensure it adheres properly. Alternatively, you can create small tabs on the lid where the handle will be attached. To do this, make tiny cuts on the lid and bend the edges upward, allowing you to slot the handle into place and then secure it by bending the tabs back down.
With the handle securely attached, your lid is now complete and ready to be used, adding both functionality and a finishing touch to your DIY incense burner

Step 7: Attach the Ears (Optional)
For a more traditional or decorative touch, you can add “ears” to the sides of your incense burner. These small, oval-shaped pieces give the burner a classic, urn-like appearance. To create the ears, use the leftover aluminum scraps from your previous cuts.
Begin by cutting out two small ovals from the aluminum, ensuring they are of equal size. These ovals will serve as the decorative ears for your burner. Once cut, you can slightly curve or shape them to match the contour of the burner base, giving them a more natural and integrated look.
Next, decide where you want to place the ears on the sides of the burner. Symmetry is key here, so measure or eyeball the positions to ensure they are evenly spaced and aligned. Once you’re satisfied with the placement, use a strong adhesive to attach the ears to the burner base. Apply the glue to the back of each oval and press them firmly onto the sides of the can, holding them in place until the glue sets.
Final Thoughts
This DIY incense burner project is a simple yet powerful example of how everyday items, often considered waste, can be transformed into something both functional and beautiful. By using a common beer can, we not only create a unique, personalized piece but also take a step toward more sustainable living. This project encourages us to see the potential in the materials around us and to think creatively about how we can repurpose them. Beyond the practical outcome, the process itself is rewarding, offering a chance to engage in hands-on crafting while contributing positively to the environment. As you enjoy the soothing aroma of burning incense from your handmade burner, you’ll be reminded of the value of recycling and the impact of small, thoughtful actions in our daily lives